Titetuk, the hat with no swatch
Sometimes I don’t have any w.i.p. (or almost) and I want to start a new project right away, without having to think or plan anything. I don’t want to wonder if the yarn will be adequate for the pattern, if I have enough in my stash… and I don’t want to knit a swatch and wait for it to dry to measure it!
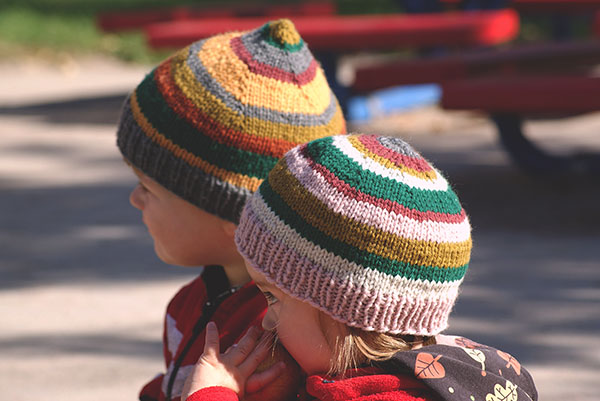
So this fall, when I realized that my children needed new hats quickly, I grabbed from my stash and started knitting right away, even before I had measured their heads. If you follow this blog you will remember the bébéguin baby hat that can also be knitted without a sample. Titetuk is built according to the same principle, but its shape is different.
Construction
Titetuk is knit from top to bottom. So we start with a small number of stitches, then we increase until we have the desired head size, then we continue without increasing to have the desired length.
Choosing your yarn
You can knit this hat plain, striped or with a stranded colourwork pattern in the section without increase. Here, I used my leftover Quince and co Lark wool. As I have already knitted 3 sweaters and 3 pairs of stranded mittens with this wool, I had several leftovers of different colours! You could also use leftovers of different yarns, but of similar size.
You can use almost any size of yarn. I would not recommend taking big chunky wool to make a baby hat, but this is the only example of bad yarn choice that comes to mind.

Round or pointed tip?
You can make this hat with a round or pointed tip. One option is no more difficult to knit than the other, it only depends on the number of stitches you cast-on at the beginning.
Size
You can make a hat of any size with this method. You will need to measure the head circumference of the person who will wear the hat. You can also measure the length from the top of the head to the bottom of the ear.
Material
- yarn in sufficient quantity
- double pointed or circular needles with a size adapted to your yarn
- double pointed or circular needles a smaller size to knit the ribbing
- 5 stitches markers for the version with the pointed tip
- 8 stitches markers for the version with the round tip
- a tapestry needle to weave in all ends
Instructions
*Before you start, be aware that you may feel confused in your stitches and markers in the first rows. Don’t be discouraged, it will be resolved quickly.
Cast-on 6 stitches for the pointed tip version and 9 stitches for the round tip. Join in round.
Round 1 : knit 1, *place marker, knit 1*, repeat from * to * to the end. You can tie a thread to the first marker to remember that the round starts with this section.
Increase round : *knit to marker, yarn over, slip marker on right needle*, repeat from * to * to 1 stitch from end, knit 1.
Round without increase : knit all stitches, making sure you knit the yarn overs through back loop so it doesn’t create holes.
Alternate the increase rounds and rounds without increase until the circumference of the knitting is equal to the desired head size. Then knit all rounds without increases. You can remove all markers, leaving one to mark the beginning of the row.

Continue until work is 3 or 4 cm (1¼ to 1¾ ») shorter than desired length. Change for smaller needles and start knitting in ribbing 1-1 (*knit 1, purl 1*). If you have an odd stitch number, end the first round with purl 2 together. Continue in ribbing for 3 or 4 cm (1¼ to 1¾ »).
*Note that if you change colour to knit the ribbing, I advise you to first knit 1 row with this new colour, then start the ribbing. It will be prettier that way.
Bind off all stitches, weave in ends and admire. You can also block the hat or be lazy all the way like me and not block it.


